In this tutorial, I’m going to show you how to create email accounts in cPanel. It’s an exceptionally quick process and can be done in less than a couple of minutes.
When you set up a website, you have the ability to create email addresses using your domain. Instead of sharing a gmail.com account, you can proudly display the site with an address at yourdomain.com.
Using cPanel makes the process of setting this up very easy.
Why Use Domain Specific Email Addresses
A lot of web filters are set up to block messages from web-hosted domains. For instance, some filters are set up to block hotmail.com and yahoo.com from flooding into an inbox.
This is because free web-based email is often used by questionable people to spread spam and malware.
Domain addresses also denote a sense of professionalism. People are more likely to trust joe@ggexample.com over joe@yahoo.com. Think about it, would you trust an important message from PayPal or your bank if it came from @gmail.com?
Create Email Accounts from cPanel
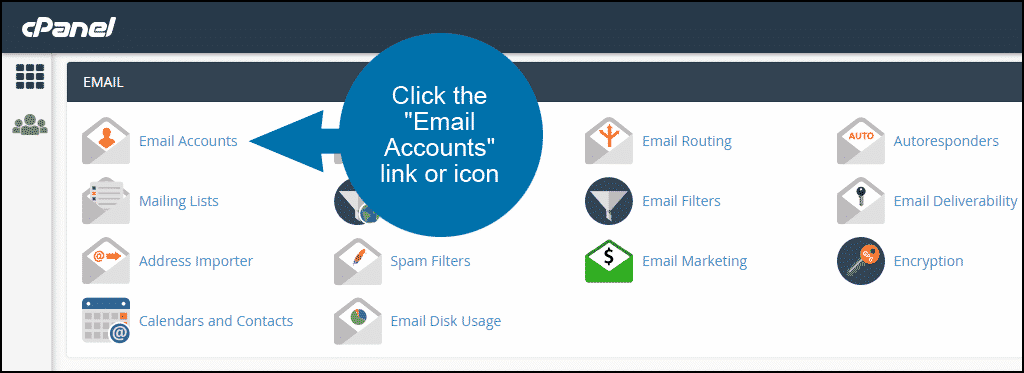
Log in to cPanel. In the “Email” section, click the “Email Accounts” link or icon.
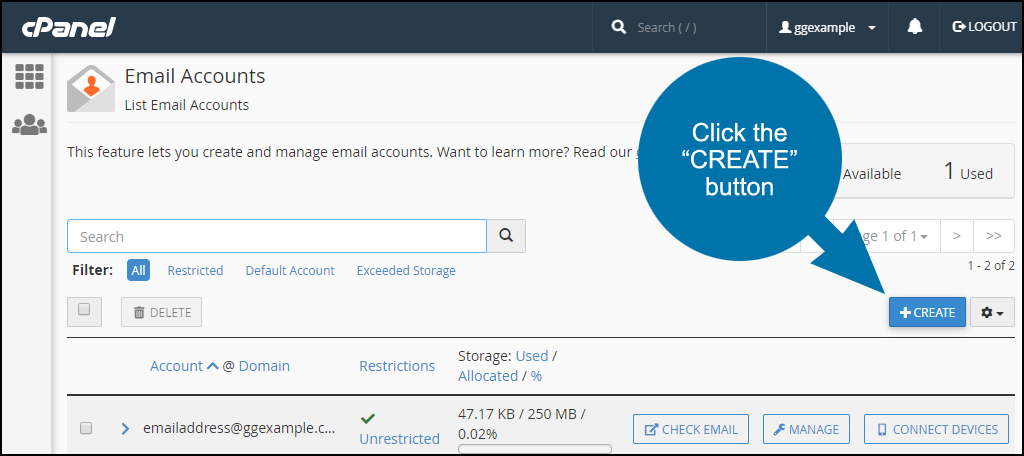
Click the “CREATE” button.
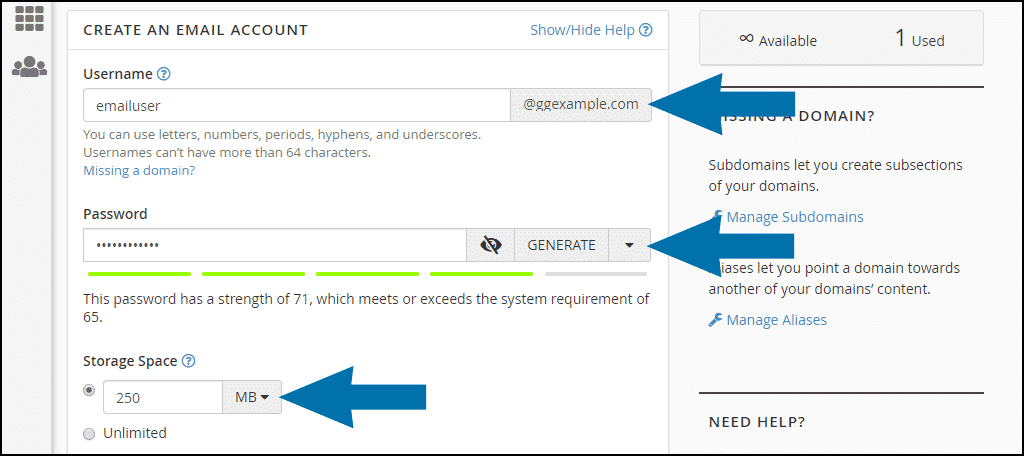
On the next screen, you will enter the information for the address.
- Username
Enter a Username for the email address you want to create and select the domain from the drop-down (if you only have one domain, it will be preselected). - Password
Here is where you enter a password. The system will scan the complexity of your word and give you a weak-to-strong rating. You can also click “GENERATE” to create a password that is difficult to crack. - Storage Space
Enter a size in MB in the field (you can select a larger storage unit from the drop-down), or select the “Unlimited” option.
If the email account exceeds the Storage Space specified here, incoming mail will bounce back to the sender, so plan accordingly.
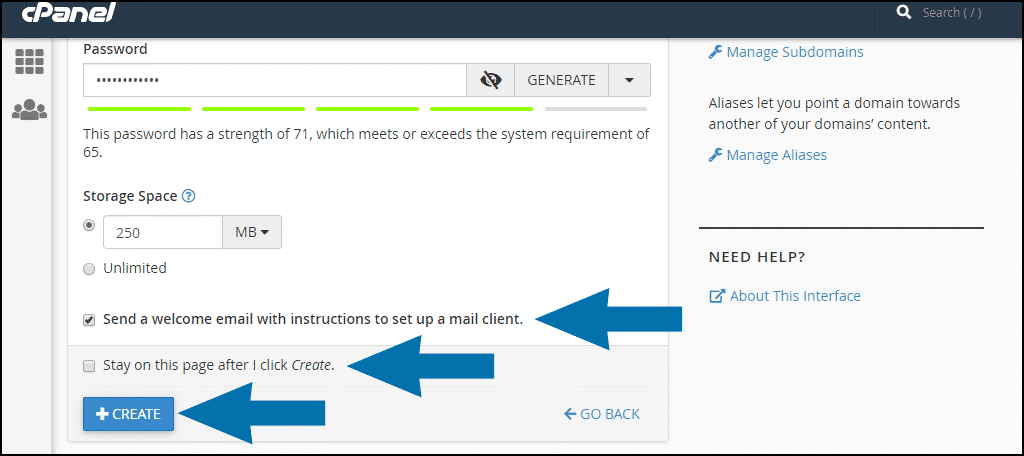
- Leave Send a welcome email with instructions to set up a mail client checked to send a welcome email.
- Check the Stay on this page after I click Create box if you are creating multiple email accounts. When the box is unchecked, after the account is created you will be redirected to the “List Email Accounts” page.
- Click the “CREATE” button.
Now you have a new address ready to send or receive messages.
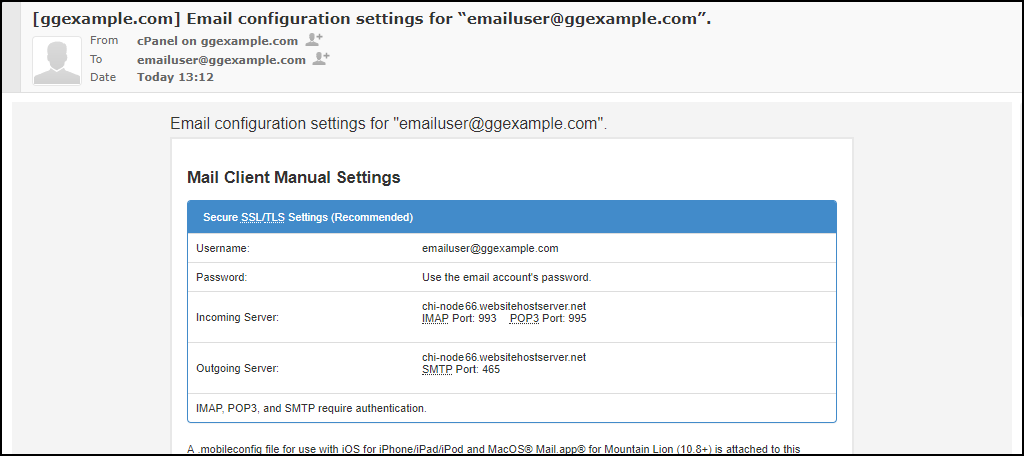
Leave the Send a welcome email with mail client configuration instructions option checked. This is a sample of the configuration email that you will receive after creating the account.
You can access the welcome email from webmail clients. This lets you see the message before using a traditional email application.
Typically cPanel accounts can access webmail clients through a URL such as:
https://webmail.ggexample.com/
https://ggexample.com/webmail/
Replace “ggexample.com” with your domain name.
Email Is Important
Email is one of the most utilized methods of digital communication on the Internet. It’s widely used as a form of marketing as well as personal connections.
Creating a different address for each part of your organization helps keep the spam limited and messages going to the right personnel. Keep the data organized as it will help keep things streamlined for efficiency.

I have purchased a cpanel. How do I create a new email address in my domain for gmail?